pomoDoNotDisturb
Purpose
Have a small screen showing if you are available, do not disturb, or out of office and another screen as a control hub. I wanted to learn something new and learn how to make a pi zero communicate with a Raspberry Pi 3. I also wanted to keep it offline.
What it can do
- Switch status:
- Available
- Do Not Disturb
- Out of Office
- Start a Pomodoro:
- Sets status to Do Not Disturb
- Start a Break:
- Sets status to Available
Demo
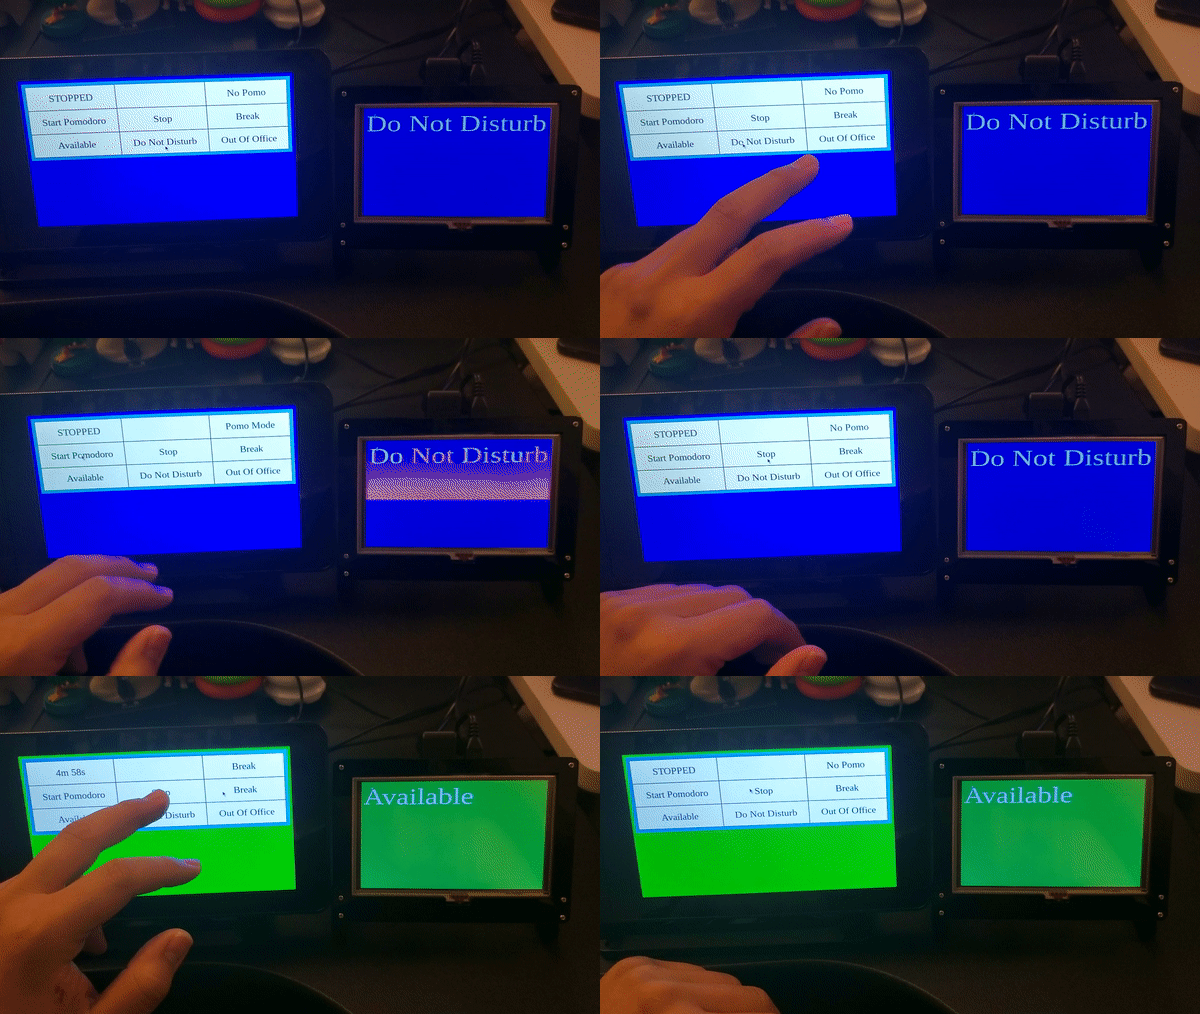
For my setup I have the Pi Hub with a touchscreen and and the Pi Zero on a regular hdmi screen
What I learned
- Setup usb/ethernet Gadget
- Setup static IPs for usb connections
- Serve js libraries offline
- copy unpkg or cdn libraries to local files
- Use Python3
- pip3, python3 server.py
- Open browser after booting on a raspberry pi
- Use Dockerfile to create python container
- Setup Development environment using Docker
Install Instructions for Docker
- Install Docker
- Clone repository
- Open terminal and navigate to repository
- Create docker image
docker build -t pomodonotdisturb -f .Dockerfile . - Run server in background on docker
docker run -d -p 5000:5000 pomodonotdisturb - Open browser and go to the following address
http://localhost:5000/hub- The page should now be served
Install + Run Instructions for Linux
- Clone repository
- Open terminal and navigate to repository
- Install libraries
pip install -r requirements.txt - Run server
python src/server.py - Open browser and go to the following address
http://localhost:5000/hub- The page should now be served
Install Instructions for PI3 + PI Zero W
Setup Pi Zero W
-
Make sure to have Raspian Desktop installed
-
You can also use a regular Pi Zero for this, we will not be using Wifi or Bluetooth for this
-
Setup Ethernet Gadget
- ONLY SETUP BASIC SSH, DO NOT DO THE ADVANCED SETUP IN THE ARTICLE
-
Add Static IP to usb interface
- Open
sudo nano /etc/dhcpcd.confand add the following:
# add to the end of the file ## for pi zero interface usb0 static ip_address=10.0.0.2 - Open
-
Force the screen to stay on:
- Open
sudo nano /etc/lightdm/lightdm.confand add the following lines to the [SeatDefaults] section:
# don't sleep the screen xserver-command=X -s 0 -dpms - Open
-
Open website after booting
- Open
sudo nano /etc/xdg/lxsession/LXDE-pi/autostartand add the following at the end of the file:
#@xscreensaver -no-splash # comment this line out to disable screensaver @xset s off @xset -dpms @xset s noblank @chromium-browser --kiosk --disable-session-crashed-bubble --disable-infobars --app=http://10.0.0.1:5000/status- http://10.0.0.1:5000/status is pointing to the IP of Pi Hub
- Open
Setup Pi Hub(Pi 3)
-
Make sure to have Raspian Desktop installed
-
Clone repository
-
Install libraries needed
- Open a terminal on Pi Hub and run the following from
pomoDoNotDisturb:
pip install -r requirements.txt - Open a terminal on Pi Hub and run the following from
-
Add usb0 static IP
- Open
/etc/dhcpcd.configand add the following:
# add to the end of the file ## for pi hub interface usb0 static ip_address=10.0.0.1 - Open
-
Run the server
- In a terminal, navigate to pomoDoNotDisturb/src folder and run the following:
python3 server.py -
Go to control hub
- Open browser and go to the following address
http://localhost:5000/hub
Putting it all together
- Make sure that both Pi's are shut off
- Plug in a micro-usb cable to the center micro-usb port of the Pi Zero and plug in the other side to the Pi Hub
- Turn on Pi Hub
- Run the server
- In a terminal, navigate to pomoDoNotDisturb/src folder and run the following:
python3 server.py - Go to control hub
- Open browser and go to the following address
http://localhost:5000/hub - Pi Zero should now be showing the current status
Development Setup
ToDo
- Restart server on
*.pyfile changes - Reload webpages on
html/jschanges- For now you have to reload the page manually
Application restarts when any .py file changes using python-hotreload
Make sure that file sharing is enabled for Docker.
To enable file sharing go to Docker Dashboard -> Settings -> Resources -> FILE SHARING and enable for your drive.
Docker Development Setup
- Clone repository
- Open terminal and navigate to repository
- Create docker image
docker build -t pomodonotdisturb -f .Dockerfile . - Run options:
- Run in terminal
docker run -it --rm -e "APP_ENVIRONMENT=development" -v %cd%:/app -w /app -p 5000:5000 pomodonotdisturb - Run in the background
docker run -it --rm -e "APP_ENVIRONMENT=development" -v %cd%:/app -w /app -d -p 5000:5000 pomodonotdisturb
- Run in terminal
- Open browser and go to the following address
http://localhost:5000/hub- The page should now be served
Linux Development Setup
- Clone repository
- Open terminal and navigate to repository
- Install libraries
pip install -r requirements.txt - Run server and watch files for changes
python src/sourceChangeMonitor.py src/server.py - Open browser and go to the following address
http://localhost:5000/hub- The page should now be served
- When you make a change, the app should restart